What is Enscape
ENSCAPE FOR MAC SKETCHUP IS THE FIRST VERSION of the popular Enscape rendering application that runs natively on Mac computers. The German software interactive rendering tool has been mentioned and written about many times at Architosh, but this is our first product review.
In our typical style, when we write the first review of an application, we make part of the review instructive and introductory. And we share our experiences learning and getting familiar with the application ourselves as part of our review process.
Enscape for Mac for SketchUp runs as a plugin for Mac SketchUp users. Enscape is always a plugin—not a standalone render app—and currently, there are versions of Enscape for Archicad, Revit, Rhino, SketchUp, and Vectorworks. All of these, except SketchUp, are Windows-only versions at the moment.
Enscape Basics
Installing the Enscape plugin for SketchUp for Mac is quite straightforward. Once installed, you will find an Enscape tools palette and an Enscape menu under the Extensions menu in SketchUp. (see images 01 – 2)
UX Topics
The user experience of Enscape for SketchUp is thus: model like normal in SketchUp. To launch Enscape, click on the Start Enscape button at the top of the Enscape toolbar. This action launches the separate Enscape rendering viewport window. Next, move the window to the side of your SketchUp window so you can see both simultaneously. (Image 01)
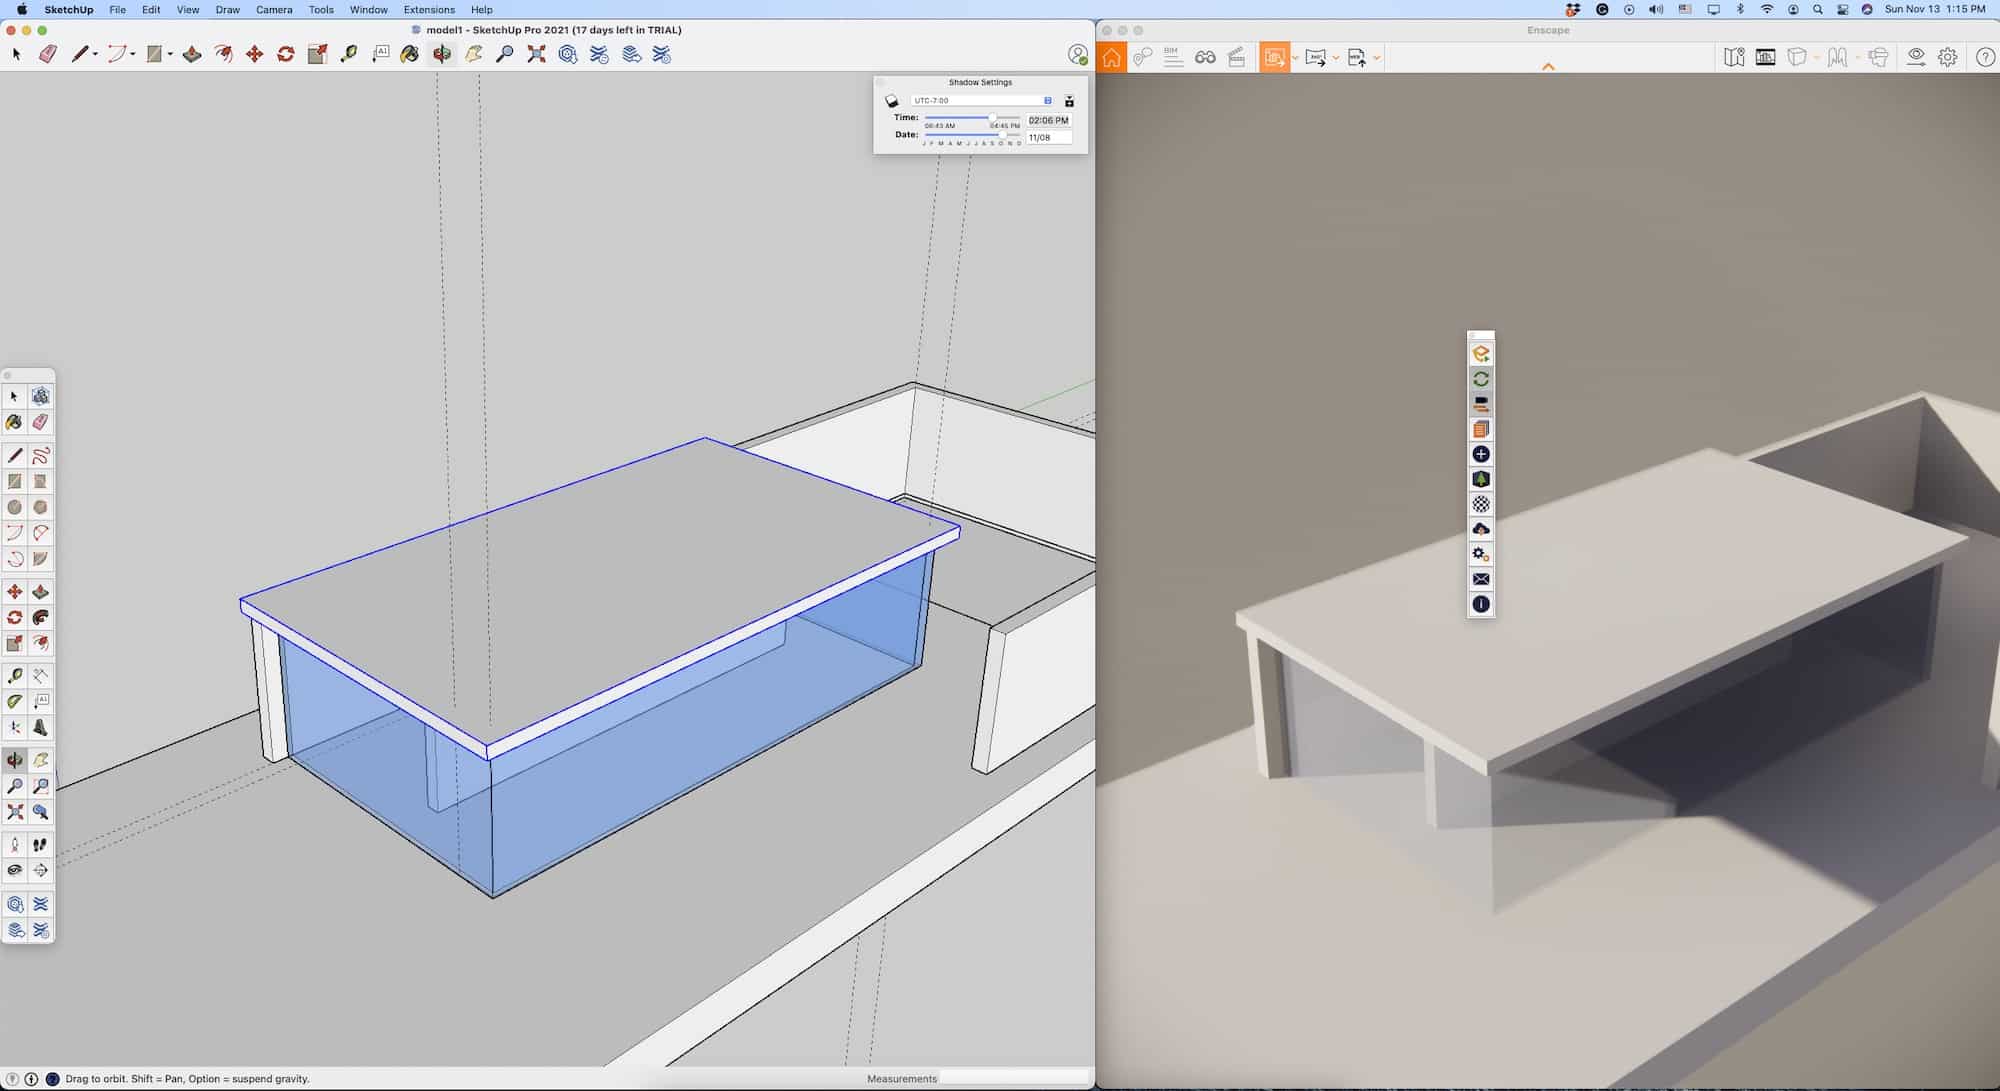
Image 01 — Enscape for Mac SketchUp. SketchUp on the left and the Enscape window on the right. The Enscape toolbar is floating over the Enscape window. An Enscape menu is under the Extensions menu item in SketchUp. (click on images to make them larger, typical)
The next button on the Enscape toolbar (2nd one down from the top) is the Live Updates button. Click on this button to enable you to model in SketchUp and see those changes instantly in the Enscape window. (Image 02)
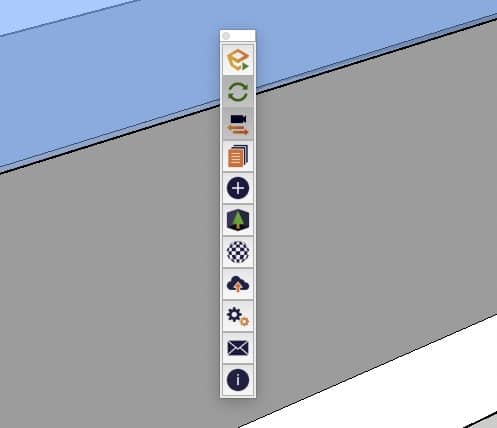
Image 02 — The Enscape toolbar is shown in SketchUp for Mac with Enscape renderer. The SketchUp window must be active for the Enscape menu to show. If you click on the Enscape window for any reason, the Enscape toolbar vanishes. Make SketchUp active again by clicking on it, and the Enscape toolbar re-appears. The buttons discussed start at the top and work down.
The third button down is the Synchronize function which means all window navigation and view changes in SketchUp get mirrored (reflected) in the Enscape window. (see image 04 and notice that the model is the same orientation in both windows). Note the shaded buttons.
Skip the 4th button. The 5th button looks like a black circle with a plus sign and is for Enscape lights (more below). The 6th button looks like a tree, and this brings up the Asset Library (more on this later). The 7th button looks like a materials editor, a common symbol in rendering tools. We get into this in the next section.
The 8th button is the Uploads Manager, and there you manage panos and web standalone renderings, and we will cover this under the Rendering section below. The final buttons in the toolbar are for app preferences or settings, feedback, and license and version info. (Image 02)
Navigation
Navigating your Enscape rendered model will take some practice, but it is mostly straightforward. The first thing to learn is that synchronization is your friend. In other words, rely on using your developed navigation skills in SketchUp to manipulate the Enscape window’s camera position. Rely on this until you fully master the Enscape navigation tools.
If your model looks different or far away in the Enscape window or has vanished, click once on the Synchronization button (third button from the top, image 02). This snaps the model into the same camera view as SketchUp.

Image 03 — How navigation works in Enscape’s window–synchronization off.
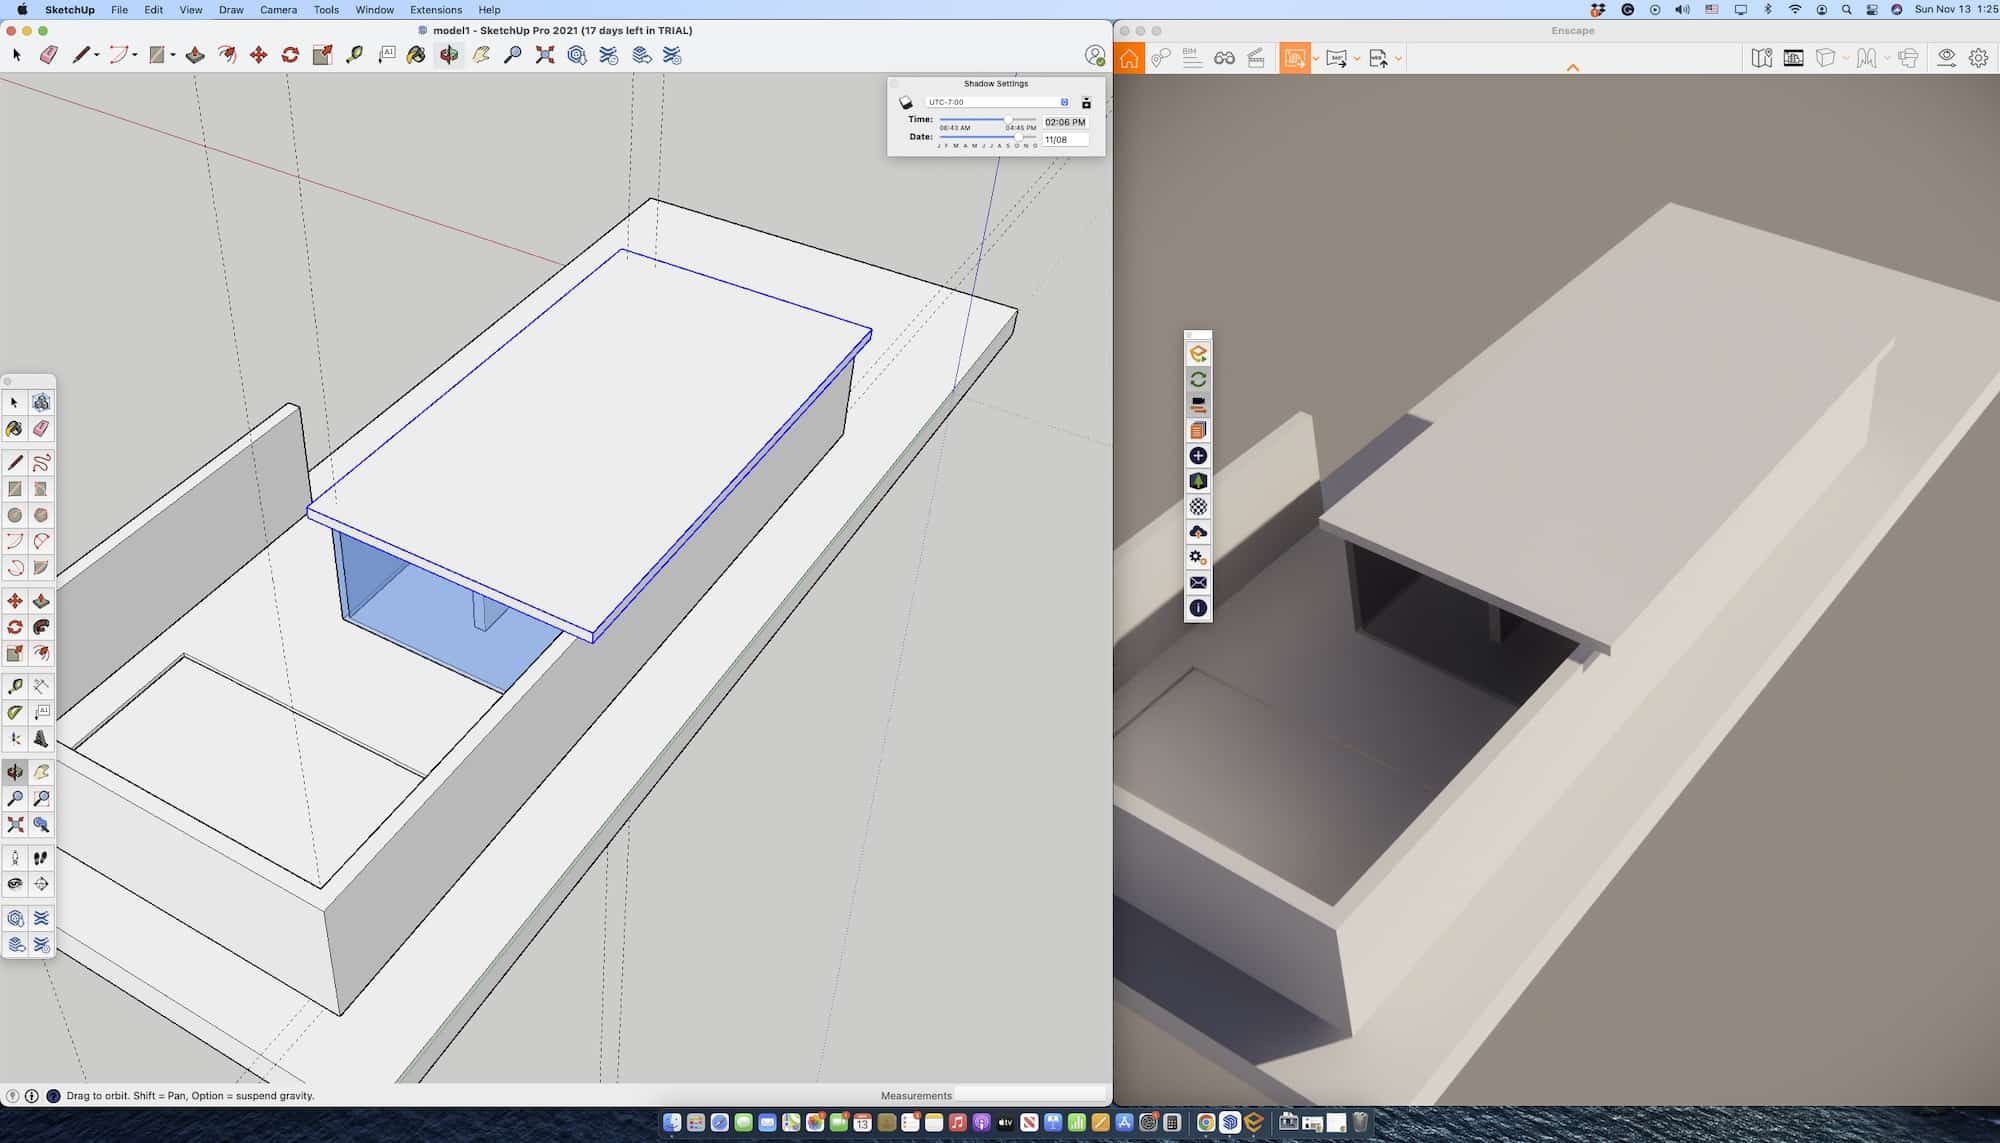
Image 04 — How navigation works in Enscape’s window–synchronization on.
Every time you launch Enscape, a How To Get Started window pops up, providing pointers on navigation, most importantly. Use the keyboard keys A, S, D, and W to move left (A), right (D), forward (W), and back (S). This same navigation works with the arrow keys.
You can speed up these movements in the Settings for Enscape access via the gear icon in the main Enscape window. (See the movie below and image 05.)

Image 05 — Enscape Window Settings.
A left mouse click rotates the object model around the viewport; a right mouse click orbits the viewport camera around the object model. Getting good at using these will quickly position you anywhere in the model in the Enscape window. To change the time of day and hence the sunlight, add the Shift key with a right mouse click and drag right or left to move the time.
In this movie, we can experience Enscape walk-thru / fly-thru animation.
To do a fly-thru or walk-thru experience, you simultaneously use both the navigation keys and the left mouse button. See the movie inline above for an example of the fluidity of navigation possible.
Enscape Window Icons
From the top left, the icons are Home Mode, Collaborative Annotation, BIM Mode, View Management, Video Editor, Screen Shot, Mono Panorama, and Web Standalone. (image 06 below)

Image 06 — The Enscape upper toolbar in the Enscape window.
Working from the opposite direction on the right, Help Pane, Enscape Window Settings, Visual Settings, VR, Navigation Mode, Project Mode, Safe Frame, and Minimap round out the Enscape window top buttons.
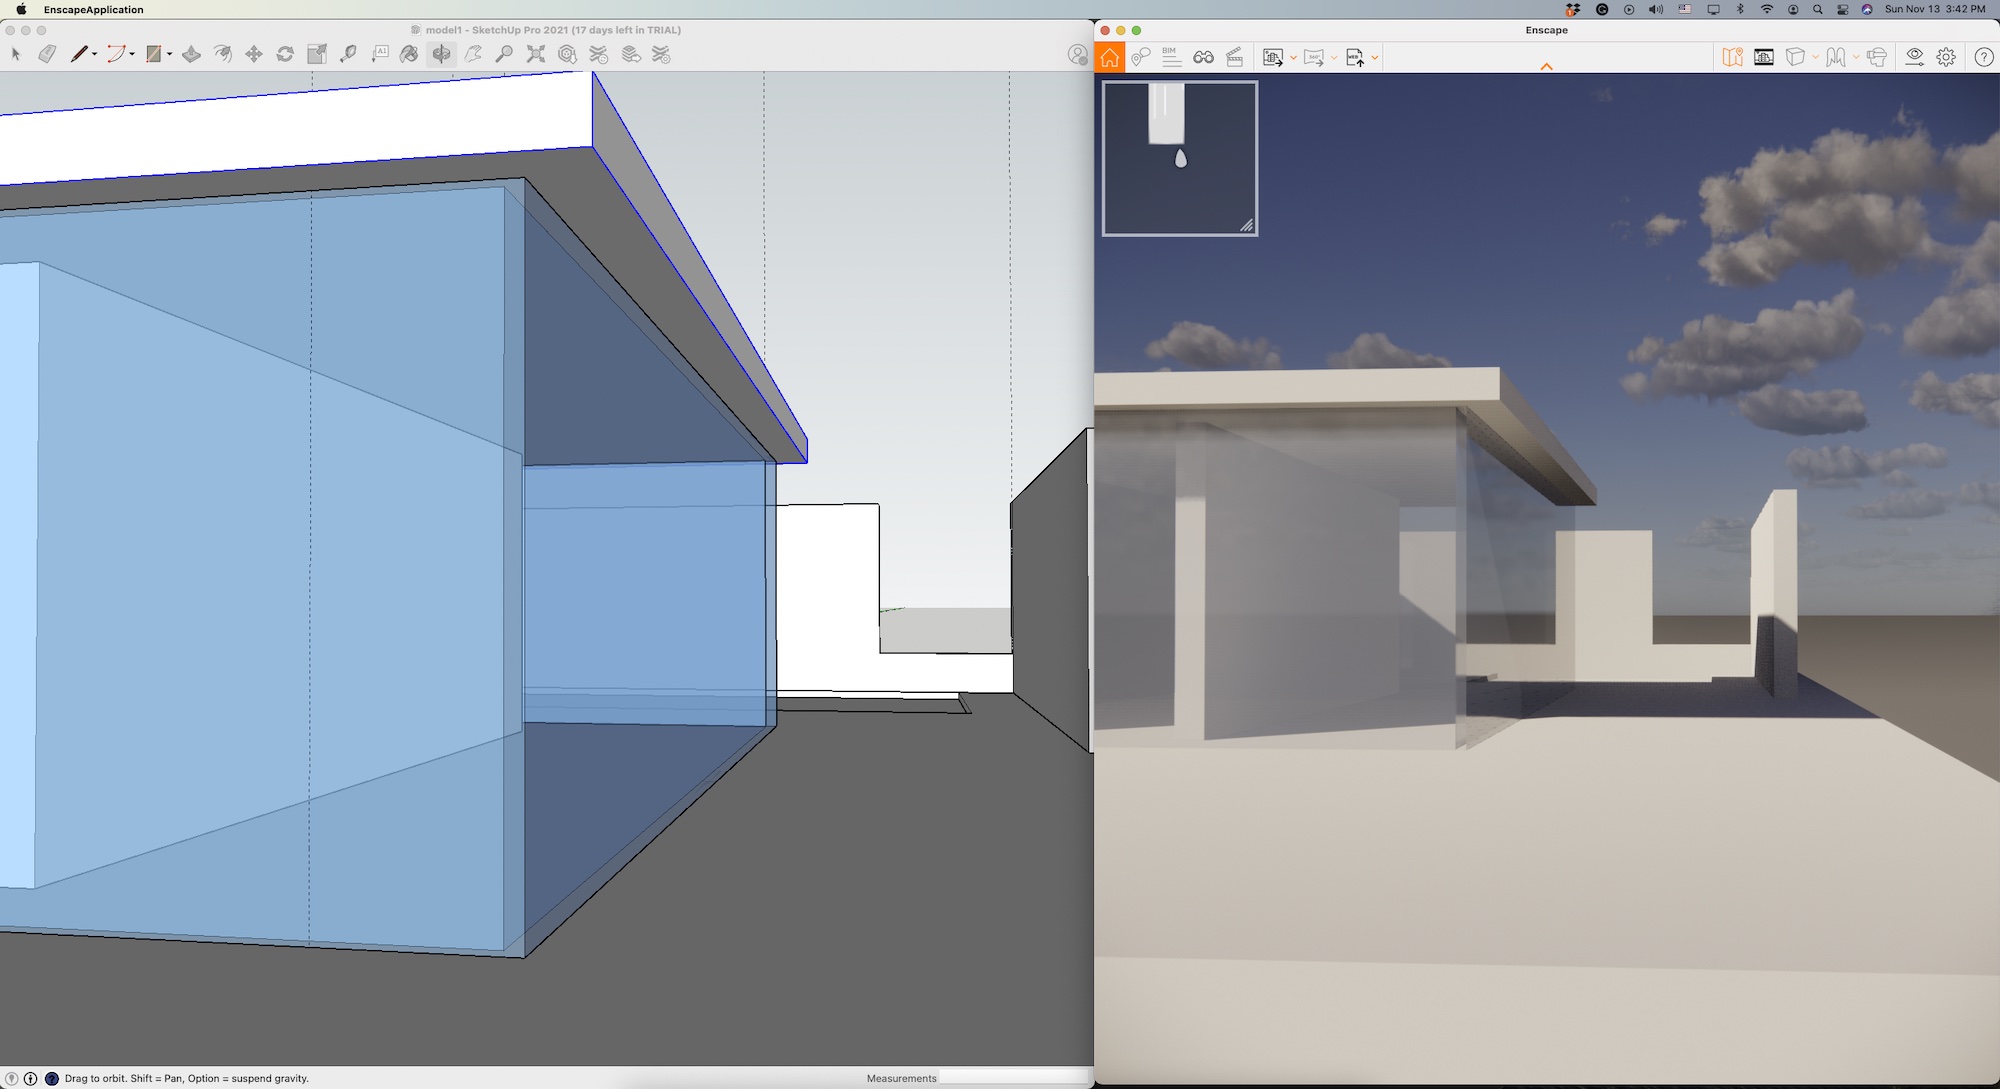
Image 07 — Enscape’s minimap is shown in the upper left corner of the right Enscape window.
We will touch on a few key tools for now. If you create SketchUp Scenes, these automatically sync with Enscape and appear under the View Management icon (left side). You can toggle between SketchUp scenes. This is a handy feature.
Every Enscape window has its own settings; you access them from the gear icon (right side buttons). These control the mouse speed, smoothing, and movement speed. They also determine the default camera height reference.
I will touch on other controls below. This covers the basics, and the SketchUp user is likely anxious to understand how to address materials, lighting, and explore rendering options.
next page: Lighting, Materials and Objects in Enscape for Mac

Reader Comments
Comments for this story are closed