
Continued from page 1
New Graphic Overrides—Visualizing Building Data Differently
The new Graphic Overrides Combinations is a visual way to apply wholesale changes to the appearance of 2D and 3D views of the BIM model without changing default visual appearances of elements set in pen color, line type, thickness, fills, surfaces, etc. When you apply a graphic override combination to a view the drawing view or 3D model view visually changes, inheriting a graphics recipe of sorts. (see images 04 – 08)
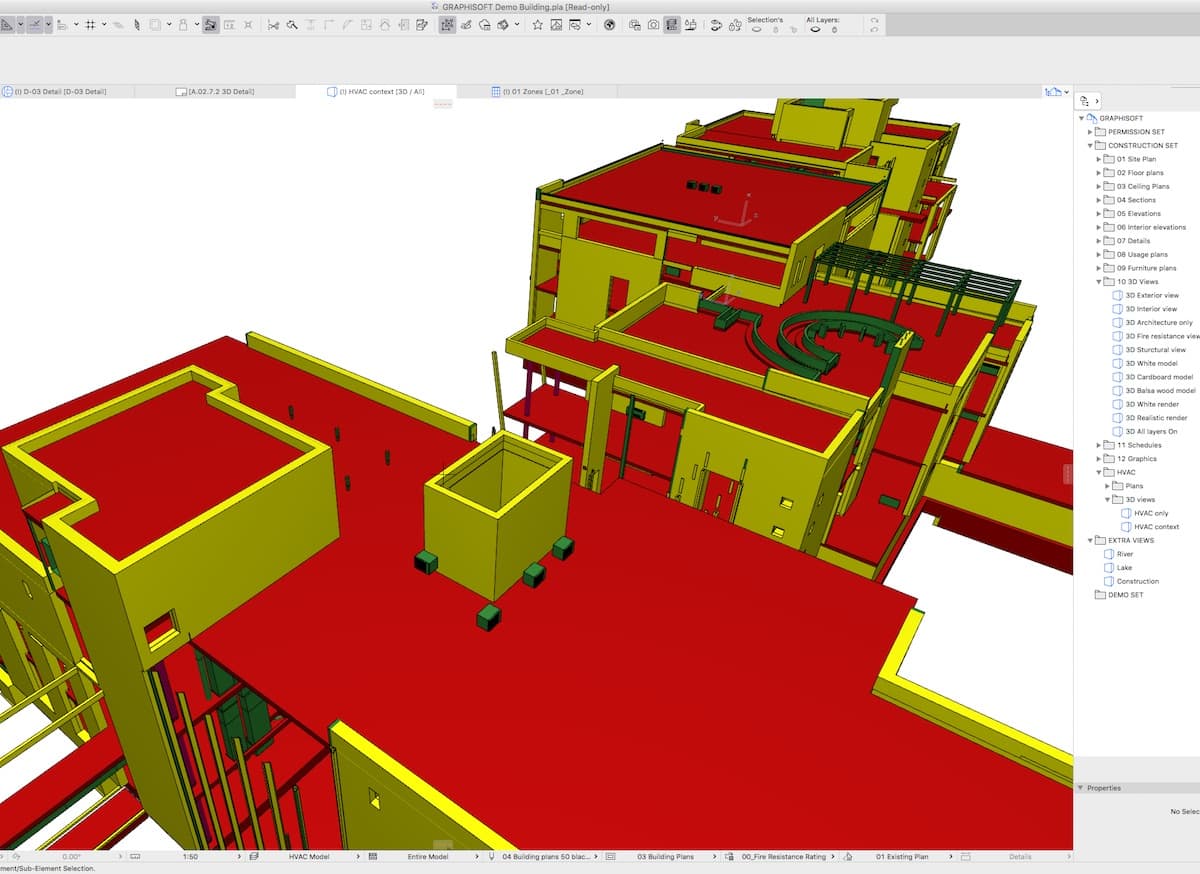
04 – New Graphic Overrides can alter the appearance of BIM model elements based on criteria met rules. In this example, colors denote fire resistance measured in minutes (eg: 60, 90 min., etc).
Graphic overrides are useful for several different purposes. On obvious one is purely visual and appearance oriented. A default white-model graphic override can change the entire BIM model to just white. Another one changes the BIM model to balsa wood or cardboard. (see images 05- 07) And you can make “x-ray” type transparent views into the model leaving certain elements solid and in bright colors to visually isolate them for multiple purposes. (see image 07)
Using Graphic overrides one can set up rules—when various elements in the BIM model or data meet certain criteria—a graphic override (appearance setting) can be applied to just those elements.
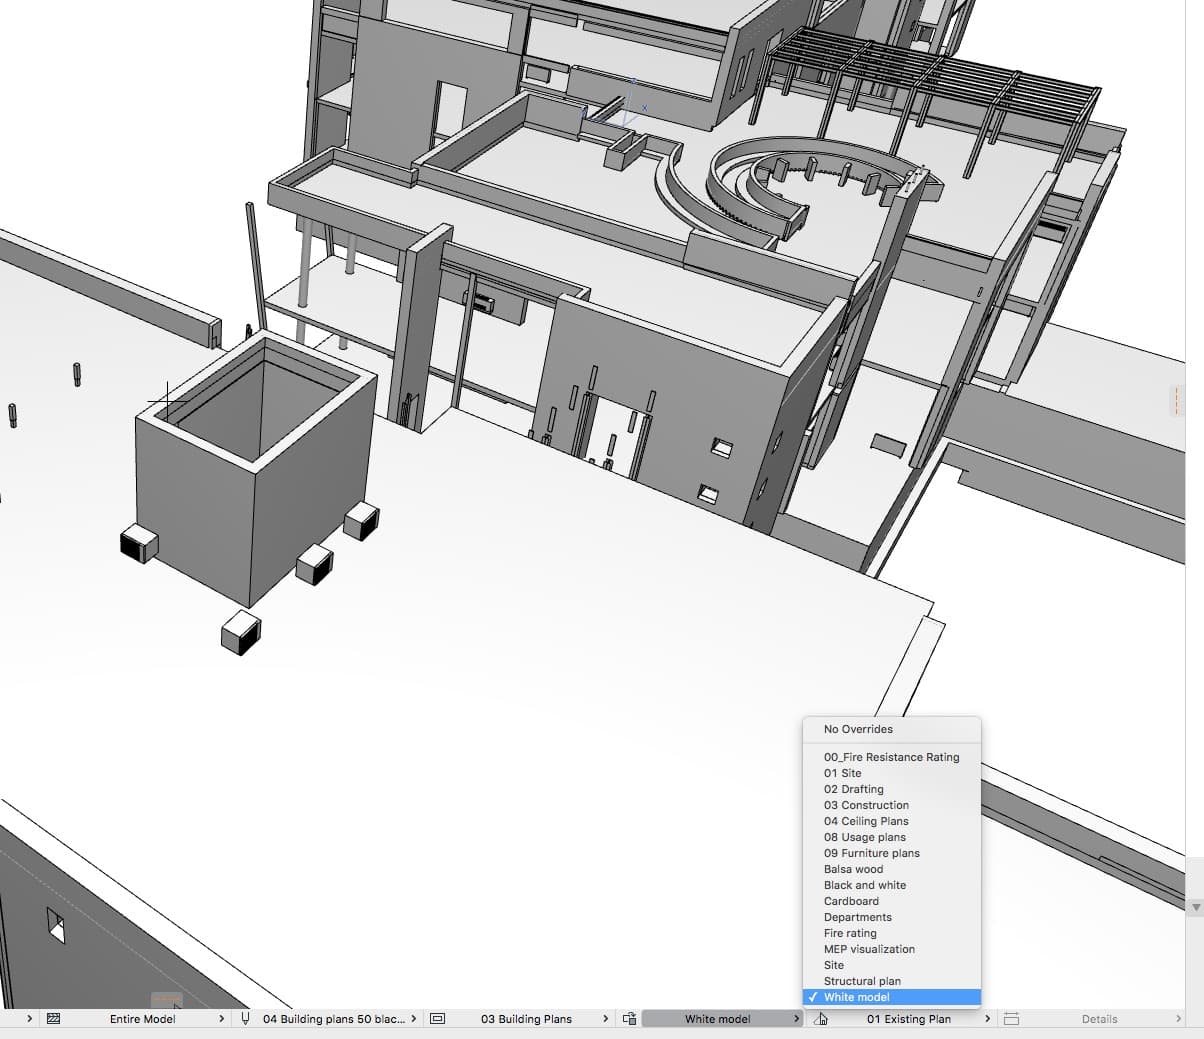
05 – One default overlay is White model, turning the entire BIM model into something visually simple.
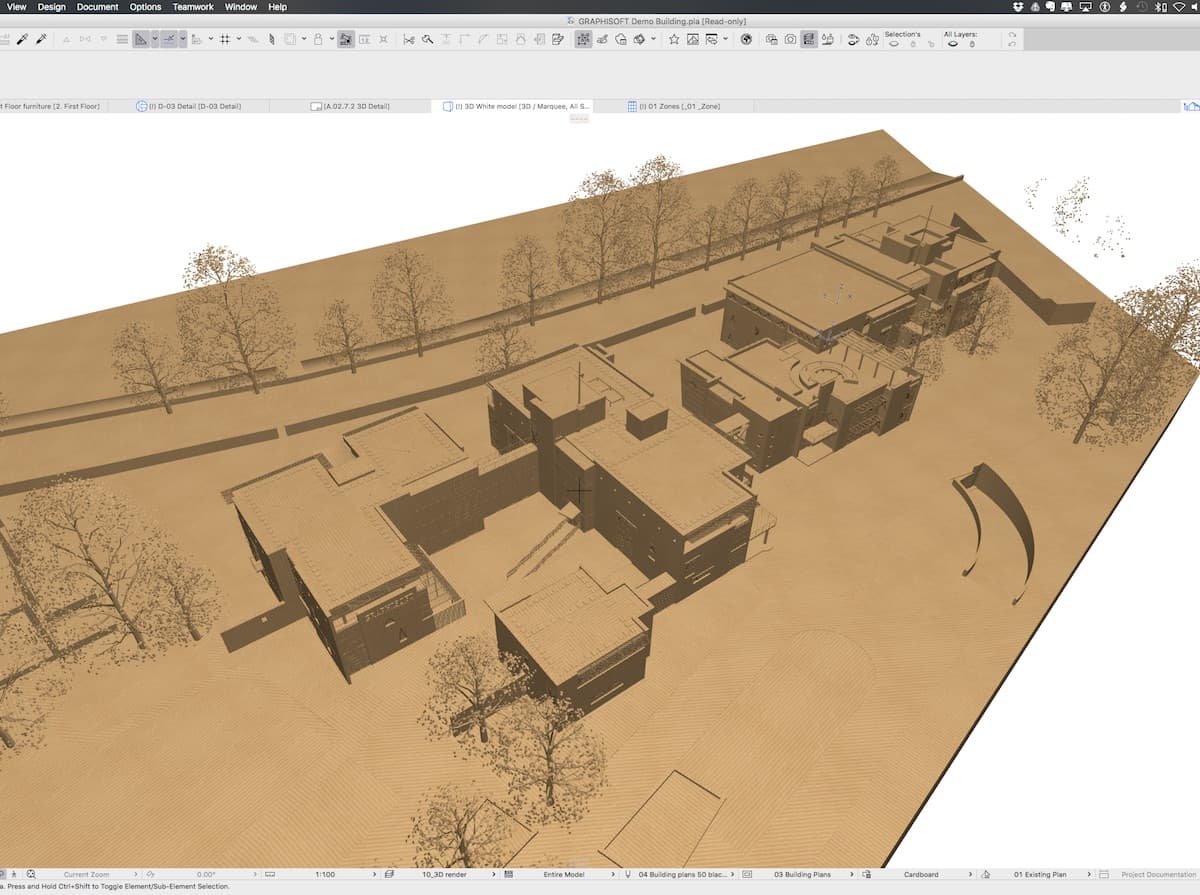
06 – Another view with the graphic override Cardboard applied.
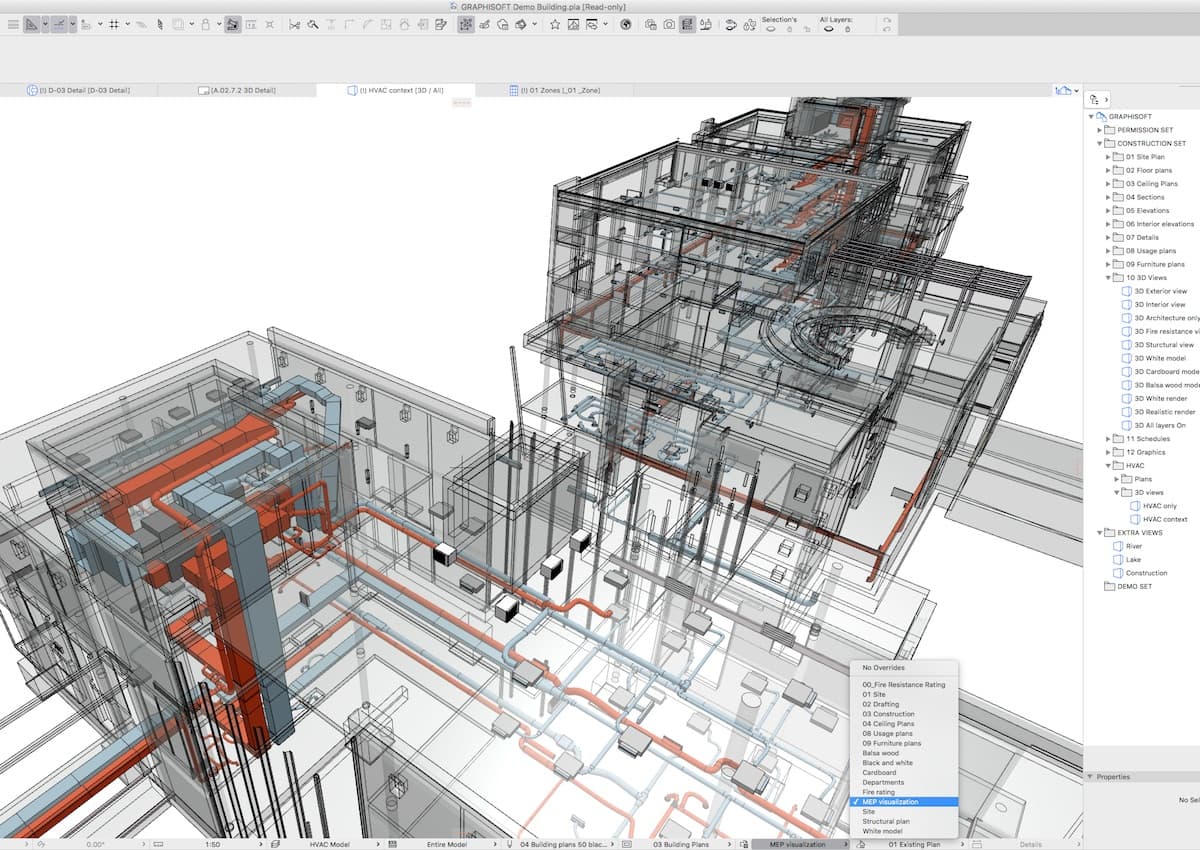
07- An overlay view can isolate particular elements in the BIM model, like the mechanical ductwork.
For example, one can set up a fire resistance rating graphic override, which quickly turns the model into an instance graphic representation that delineates which elements are fire-rated for say 60, 90, or 120 minutes, etc. Each criterion can get its own color, for example, to delineate the rating level. (see image 04)
Another example is to turn nearly all elements of the BIM geometry transparent except the mechanical model elements, thereby enabling an x-ray type view of the BIM model with a highlighted focus on ductwork. (see image 07) Other examples include making graphic overrides for views that highlight various departments in a building, or sound transmission criteria in building components. The possibilities are quite endless.
A Sample Run Through
So how easy or fast is it to do this? Let’s walk through an example, from scratch.
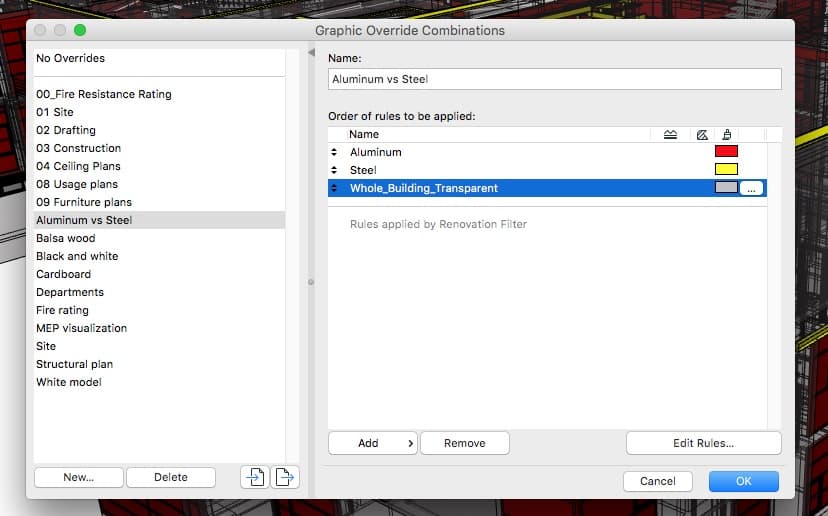
In the image below I created a new graphic override combination called Aluminum vs Steel. (image 08) You first open the Graphic Overrides Combinations dialog. (see image 09 below) On the left are previously saved or default override combinations. I then hit the New button and create three graphic override rules.
One rule will be the rule that finds all materials that are made out of aluminum, the second rule finds all materials that are made out of steel, and the third rule finds all elements in the BIM model and turns them transparent as shown.

08 – I created a new graphic override called Aluminum vs Steel.
In creating that third rule I defined Criteria such that an Element Type “is” (a value equal to) “All Types” and thereby every element in the BIM model (eg: walls, slabs, roofs, doors, etc) is included in the rule. As you can see from below (image 10) I had lots of options besides “All Types” (eg: including things beyond model geometry like text, labels, fills, dimensions, markers, etc) to choose from.
09 – The Graphic Override Combinations dialog shows the creation of my new rule.
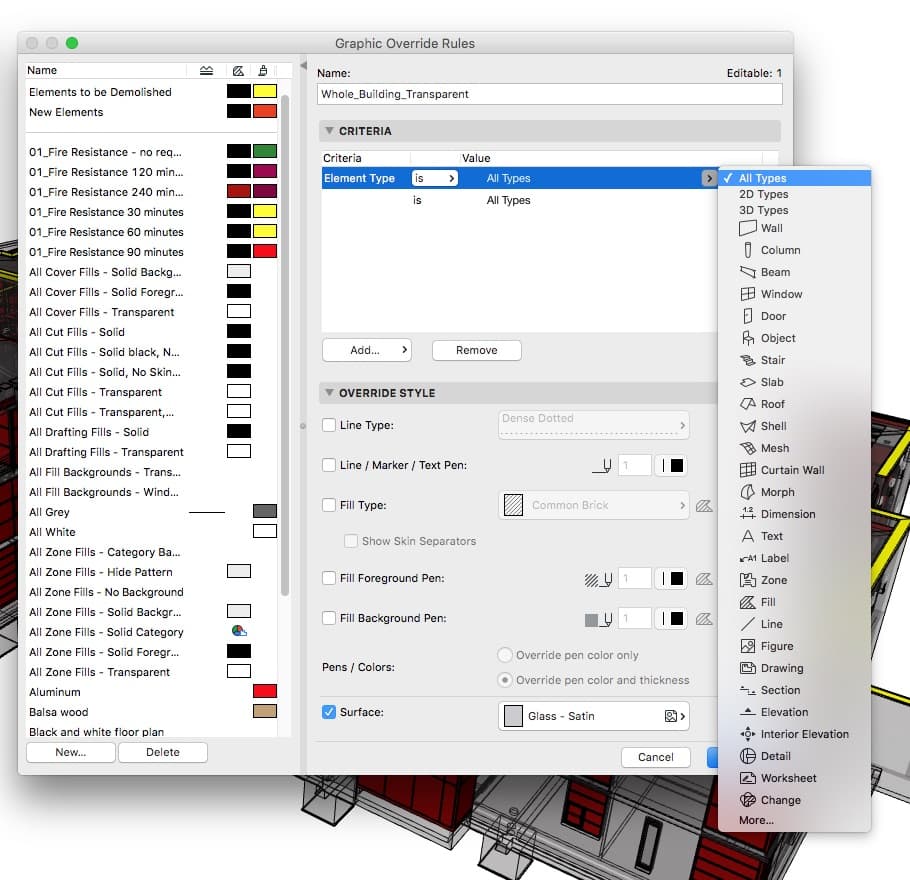
10 – You can see the selection editing of this particular rule.
My override style changes simply select Surface and then select “Glass-Satin” as my surface material choice. This rule alone turns the whole building transparent by rendering everything like it was transparent glass (OpenGL level of rendering quality).
Next, I created two more rules and chose Building Material as my criteria and from the drop-down menu selected “Aluminum.” I repeated the rule and selected “Aluminum Panels.” The graphical override applied to aluminum was a red color (no transparency). I repeated this process for steel as a material in the project using a yellow color.
Now I can apply the saved Aluminum vs Steel Overrides Combination to the viewport by clicking the OK button in the dialog. (see images 10) The BIM model view now shows steel (yellow) and aluminum (red) elements shown against a transparent view of the whole building with edge lines on. This x-ray type view, highlighting a specific feature of the structure, can be useful for various reasons—illustrative and for identification purposes. In some ways, it can function as a model checker.
Elements and Parameters
When I was first introduced to the new overrides capabilities in version 20 last year, the example I saw was similar to the one I just went through, except it visually identified doors that did not meet handicap access requirements.
Graphic override rules can be implemented on various parameters used as criteria. In general, they are applicable for new properties only and some generic ARCHICAD parameters such as height and widths of an element. That is why a rule can find a door of a particular width and determine if it meets a criterion.
The list of parameters available to criteria is shown in the next image. (image 11)
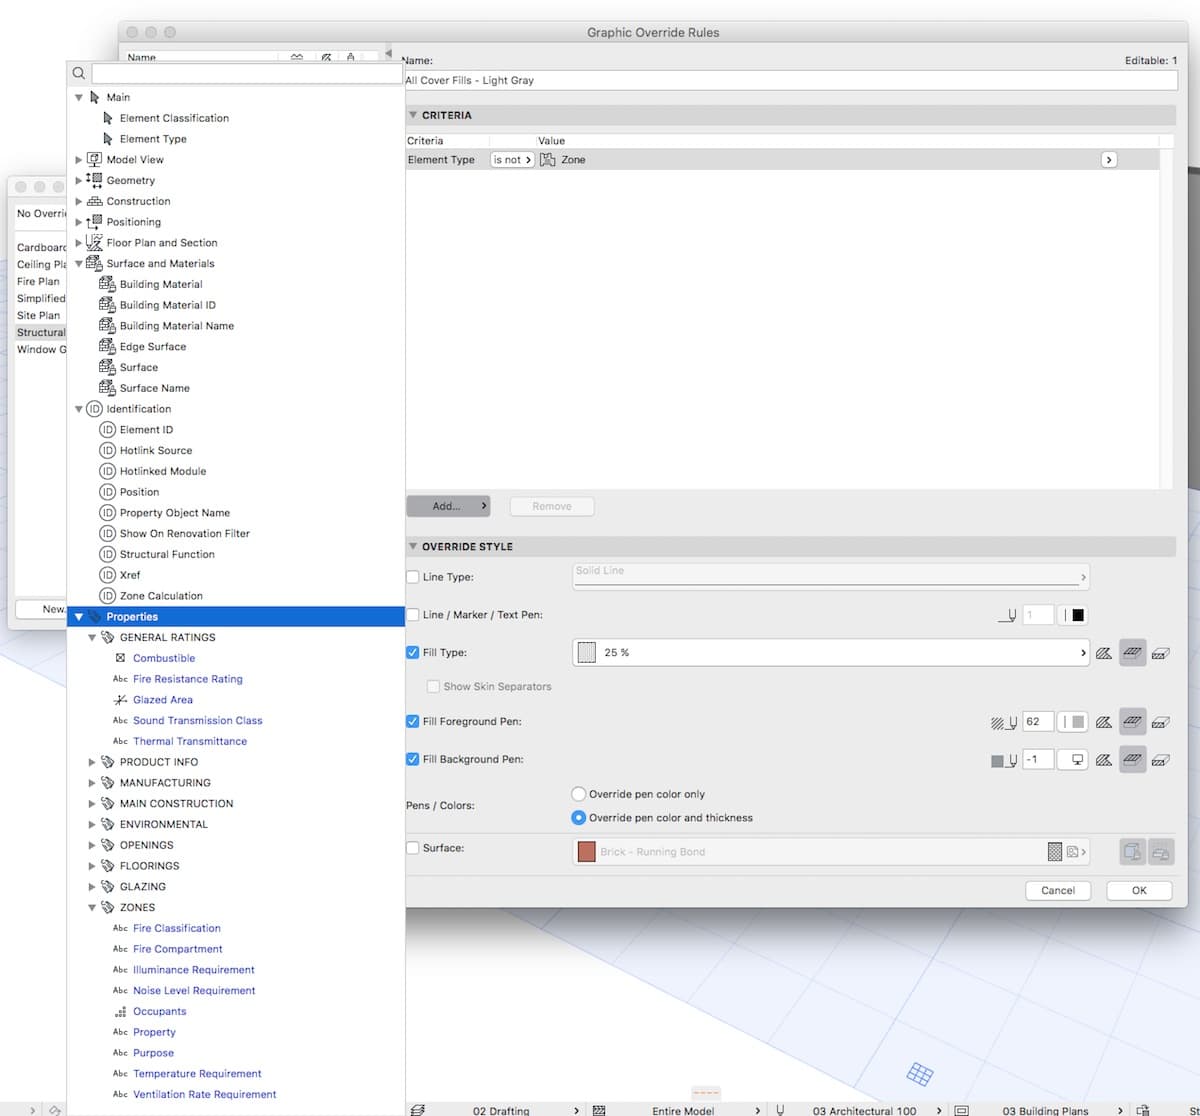
11_This view shows the available criteria for rules in graphic overrides.
12 – A custom property field can be established for any element in the BIM model and this field’s data can be used for matching criteria in a new rule.
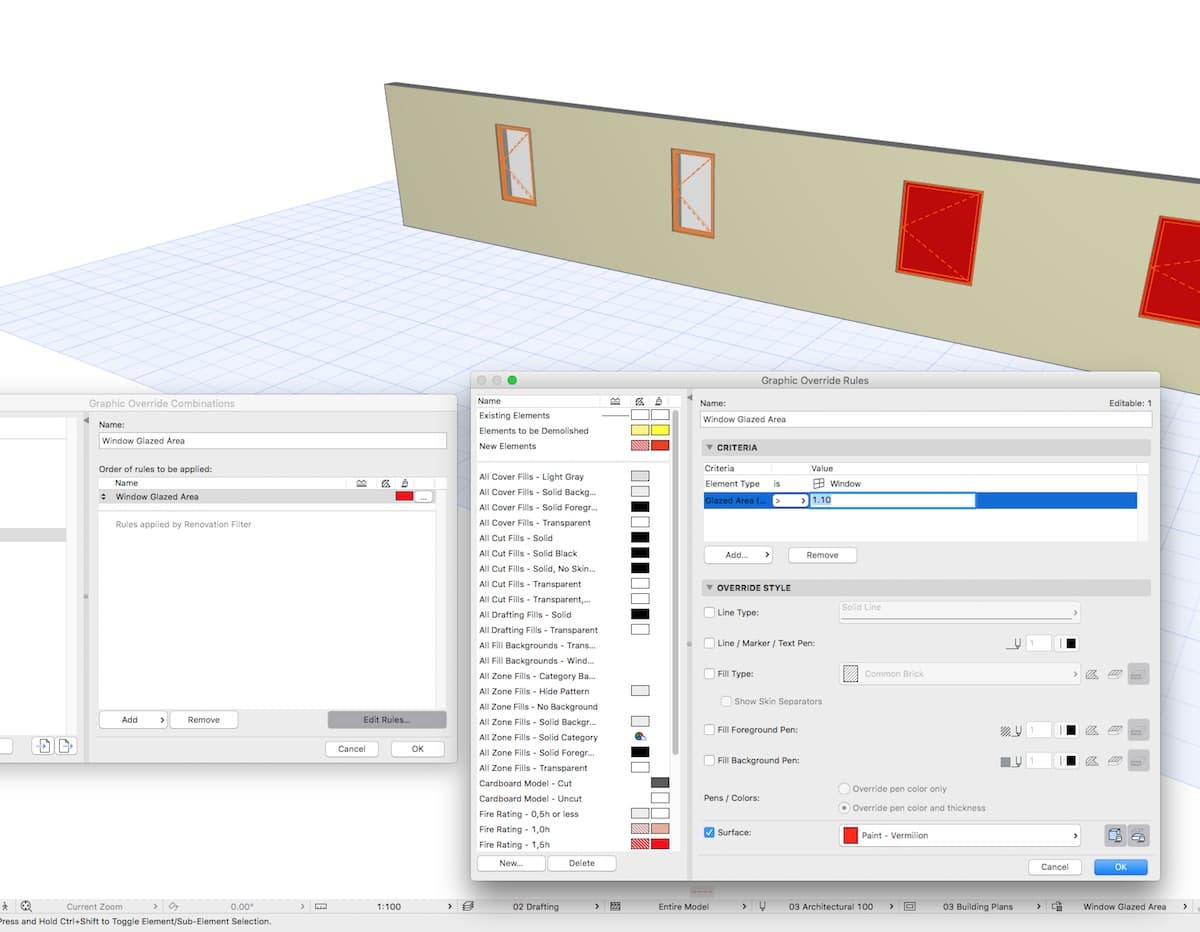
While this list is extensive, there are some data inside ARCHICAD elements which are stored as a GDL parameter. For example, the area of a piece of glazing in a curtain wall or window is stored as GDL data. This type of data is not yet accessible to criteria for the Graphic Override Rules. What do you do then if you run into this as an issue?
In the case of this glazing example, you assign a new property (eg: window glazing area) to your fenestration units and import glazing area values from manufacturer data sheets using the Excel data import capabilities. Or you can simply fill this data in manually. (see image 12 above and image 17)
next page: Getting to Data—The “I” in BIM

Reader Comments
Comments for this story are closed